One of the things that many designers always seem to miss (mostly because we never read the manuals!) is the difference between Opacity and Fill. The difference can be subtle or extreme, depending on the effect you’re looking for.
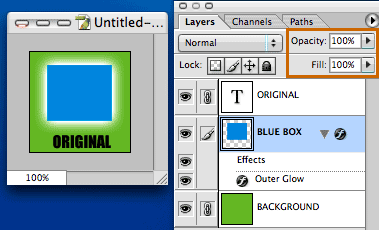
Create a layer and put an object or some text on it. Now apply a layer effect such as Outer Glow. (See image below)

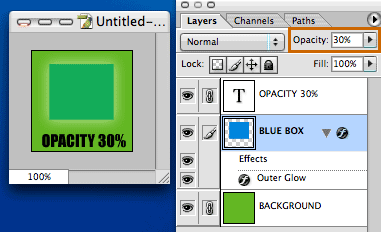
Now adjust the Opacity setting of the layer you want to adjust (in this case, the blue box) to something that will be obvious, like 30% (See image below)

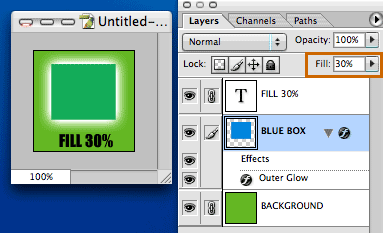
Notice that the entire layer, including the outer glow effect are faded to 30%. But maybe I only want the box itself faded. That’s easy, simply leave the opacity set to 100%, but set the Fill to 30%. This will fade the box, but leave the outer glow alone. (See image below)

There you go. Now your layer effects are untouched. If you didn’t know you had this control over your layers and effects, you were probably going under the layers menu, and creating a seperate layer out of the outer glow layer effect so that you could adjust them seperately (much like I was for a long time!)
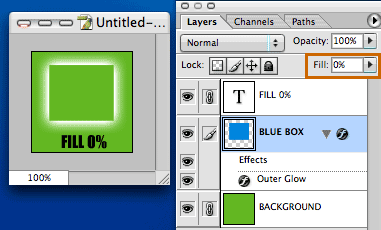
This adjustment can offer some interesting results, such as when you set the layer Fill to 0% (See image below)

Remember, Opacity affects the ENTIRE layer, while Fill affects ONLY the object on the layer, not the effects you may have applied to it.
———–
Visit The Graphic Mac for graphics and Mac OS tips, reviews, tutorials and discussion.
Commenting on this Blog entry is closed.
